A hydroponic indoor garden sounds like science fiction, but it’s really just gardening with the dirt removed. Plants don’t actually need soil — they need water, light, and nutrients, and hydroponics delivers all three directly to the roots. The payoff is real: faster growth, up to 90% less water than soil gardening, and fresh herbs and greens in your kitchen year-round, no backyard required. Here’s how to build your first system without overcomplicating it.
How a Hydroponic Indoor Garden Actually Works
In soil, roots spend enormous energy hunting for water and nutrients. In a hydroponic indoor garden, the nutrient-rich water comes to them, so the plant spends that energy growing instead — which is why hydroponic lettuce can mature in nearly half the time of soil-grown. The roots sit in (or are regularly bathed by) water mixed with dissolved nutrients, while a growing medium like clay pebbles or coco coir just holds the plant upright. No soil means no soil-borne pests, no weeds, and no muddy mess in your living room.
Light does the rest. Near a bright window you can grow herbs with no equipment at all; everywhere else, a full-spectrum LED grow light on a timer does the job for a few dollars a month in electricity. The University of Minnesota Extension has excellent research-backed guides on indoor growing if you want the science behind the setup.
Choosing Your First Hydroponic System
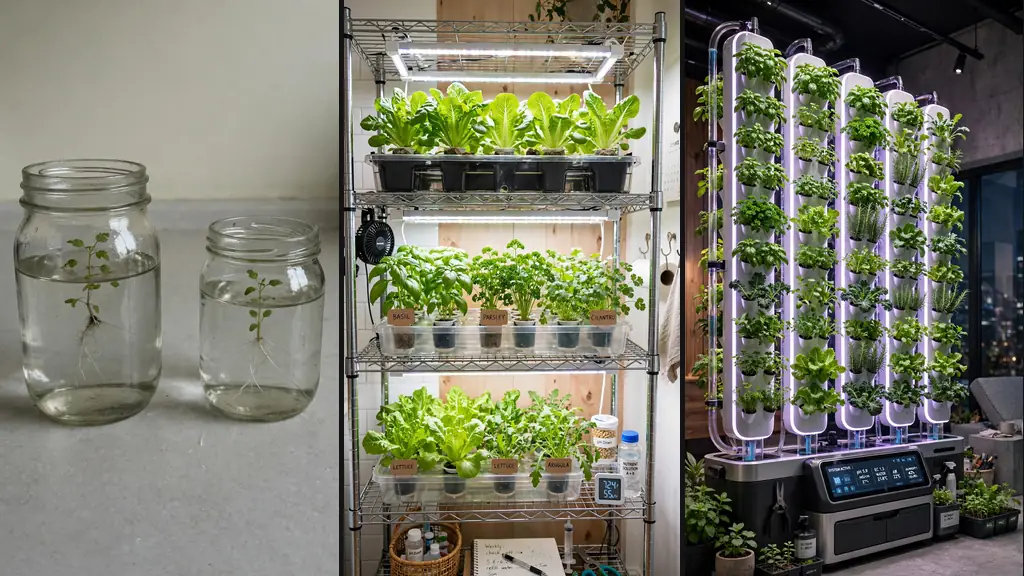
Beginners building their first hydroponic indoor garden should start with either deep water culture (DWC) or the Kratky method — both are cheap, simple, and hard to get wrong. Kratky is the ultimate starter: a container of nutrient water, a net pot with a seedling, and literally no pumps or electricity. The plant drinks the water down, the roots follow, and you top up every week or two. DWC adds a small air pump and air stone to oxygenate the water, which boosts growth for about fifteen dollars in parts.
Skip the fancy multi-tier NFT or aeroponic towers until your second or third grow. Complexity is the enemy of the first harvest — every pump and timer is something that can fail while you’re learning to read your plants. Master the simple system, get fresh basil on demand, then scale up. If you enjoy building things, our DIY indoor plant stand guide pairs nicely with a first hydroponic setup.
Setting Up Your Hydroponic Indoor Garden Step by Step
Location first: you need a spot that stays between 65–75°F, near an outlet, where occasional water drips won’t ruin anything. A spare corner, a closet with a light, or a shelf unit all work. Assemble your container — a dark, opaque tub or bucket (light grows algae in nutrient water, so opaque matters), net pots in the lid, growing medium to support the seedlings.
Mix your nutrients according to the label — and here’s the beginner mistake to avoid: more is not better. Over-fertilizing burns roots faster than anything else in hydroponics. Start at half strength, watch the plants for a week, and adjust. Set your light 12–18 inches above the seedlings on a 14–16 hour timer. Check pH every few days at first (most plants want 5.5–6.5); cheap test strips are fine to start. The growing guides at The Spruce have good visual references for what healthy versus stressed seedlings look like.
Best Plants for a Beginner Hydroponic Garden
Grow what you actually eat, and start with the easy wins. Basil, mint, and chives are nearly indestructible in hydroponics and expensive to buy fresh — the payback math is immediate. Lettuce and other leafy greens mature fast and forgive beginner mistakes. Cherry tomatoes and peppers work too, but they’re a second-project plant: they need more light, more nutrients, and hand pollination indoors.
Start seeds in rockwool cubes or just buy seedlings and rinse the soil gently from the roots before transplanting into your system. Give new transplants a few days at quarter-strength nutrients while they adjust. Within two weeks you’ll see the explosive root growth that converts most people permanently — white, fuzzy, vigorous roots are the signature of a happy hydroponic indoor garden. For more indoor-growing inspiration, see these indoor gardeners who turned their homes into green paradises.
Troubleshooting and Keeping It Thriving
Most problems announce themselves in the leaves. Yellow lower leaves usually mean too much water or not enough nitrogen; brown crispy edges mean nutrient burn (dilute immediately); leggy stretched stems mean the light is too far away. Algae — green slime on surfaces — means light is hitting your nutrient water; cover every exposed wet surface with something opaque.
The weekly routine that prevents 90% of issues in any hydroponic indoor garden: top up water, check pH, glance at roots (white and firm is healthy; brown and slimy means add aeration and consider a reservoir change), and wipe down any salt buildup. Full nutrient changes every two to three weeks keep things balanced. Do that, and your hydroponic indoor garden becomes what it should be: the lowest-maintenance, highest-reward garden you’ve ever had — vego garden design ideas can inspire the soil-based companion beds for everything you don’t grow hydroponically.