
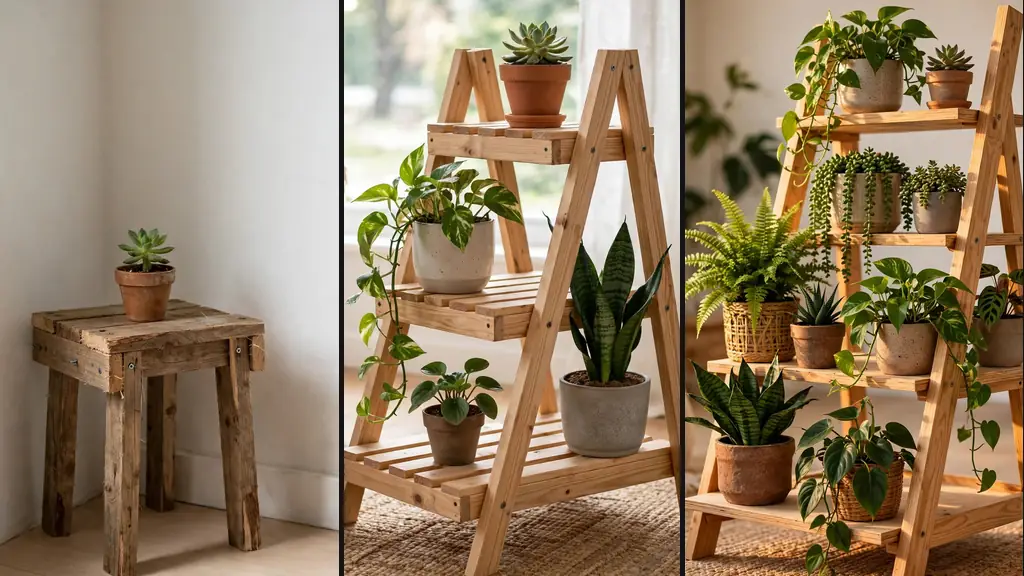
A diy plant stand is one of the most satisfying weekend builds you can take on: a few boards, basic tools, an afternoon’s work — and your plants go from sitting on the floor to looking like they belong in a magazine. Lifting pots off the ground also improves air circulation around the foliage, makes watering and rotating easier, and protects floors from moisture rings. This guide walks you through building a simple, sturdy wooden stand from scratch — no advanced joinery, no expensive equipment — plus three design variations and styling tips to finish the job properly.
Tools and Materials for Your DIY Plant Stand
You need less than you think. The essentials are a saw (a circular saw or even a handsaw handles these short cuts), a drill with a countersink bit, a tape measure, a speed square, a pencil, sandpaper in 120 and 220 grit, wood glue, and 1¼-inch wood screws. Two clamps make glue-ups far easier, and a pair of sawhorses gives you a work surface. A miter saw speeds things up, but nothing in this build requires one.
For materials, plan on one 1×8 pine board about six feet long for the top and shelf, plus a 2×2 board around eight feet long for the legs. Add interior wood glue, a small can of finish, and felt pads for the feet. Buy one extra foot of board beyond your measurements — miscuts happen, and a spare strip is cheaper than a second trip to the lumber yard. Total material cost for a basic build usually lands between fifteen and thirty dollars.
Picking the Right Wood
Pine is the default for a first build: cheap, widely available, light enough to move around, and it takes stain evenly with a pre-stain conditioner. Sight down each board before buying and reject anything twisted, cupped, or split — straight stock makes every later step easier.
For something that lasts decades, step up to poplar or oak. Poplar paints beautifully and costs only a little more than pine; oak is harder and shows off grain that looks great under a clear finish. Plywood is a legitimate third option for the top — half-inch birch plywood with solid-wood edge banding looks clean and modern and won’t warp. Skip pressure-treated lumber entirely: it’s meant for outdoor decks, it’s heavy, and you don’t want those chemicals indoors around your plants.
Measurements and Cutting
Measure your pot first, not the other way around. The top should be about two inches wider than the pot’s diameter so it sits securely — for a common 10-inch nursery pot, cut the top to roughly 14 inches square. Height is a design choice: 12 to 16 inches lifts a floor plant into the sightline, while 24 to 30 inches turns a trailing pothos into a waterfall. Mark every cut with tape measure and speed square, and label pieces with a pencil so legs and stretchers don’t get mixed up.
For the classic four-legged stand, cut four legs to your chosen height from the 2×2, then the top panel and lower shelf to matching squares. Dry-fit everything on the floor first: set the legs at the corners, lay the top on, check that nothing rocks.
Assembling Your DIY Plant Stand
Work in order and assembly is straightforward. Start with the lower shelf stretchers: thin bead of glue on the ends, position them between the legs about six inches off the floor, clamp, and drive one screw through each leg into each stretcher end. Pre-drill pilot holes slightly smaller than your screws — skipping this is the most common cause of split 2×2 legs in beginner builds.
Once the frame is square and the glue has set for an hour, attach the top panel from underneath with glue and screws, checking the legs sit flush at the corners. Wipe squeezed-out glue away immediately with a damp cloth; dried spots show through stain as pale blotches. Let the whole diy plant stand cure overnight before loading it with a heavy ceramic pot — glue reaches full strength in about 24 hours, and patience here is what separates a wobbly stand from a solid one.
Finishing: Sanding, Staining, and Sealing
Finishing is where a homemade stand starts looking store-bought, and sanding does most of the work. Start with 120-grit to knock down rough spots and soften the sharp edges — rounded edges catch light beautifully. Follow with 220-grit, always with the grain, wiping dust off between grits. Staining pine? Brush on pre-stain conditioner first to prevent the blotchy absorption softwoods are famous for.
Apply stain thinly, let it sit a few minutes, then wipe off the excess — color comes from what stays in the grain, not what sits on top. One or two coats is plenty. Finish with two thin coats of water-based polyurethane against watering spills, lightly sanding with 220-grit between coats. Paint is equally valid and more forgiving: primer plus two coats of satin paint in a color matching your room makes even pine look intentional. Let the finish cure about 48 hours before setting a damp pot on your diy plant stand.
Three DIY Plant Stand Variations and Styling Ideas
The same skills unlock three popular variations. The tiered stand stacks two or three tops at different heights on taller legs — perfect for a sunny window where every plant needs light. The mid-century version uses tapered legs with a round plywood top, stained walnut for that 1960s look. The ladder style leans two angled side rails against the wall with shelves between them, holding a whole collection in a narrow footprint.
Style the finished diy plant stand like a designer: odd numbers of pots, varying heights, one trailing plant to soften the edges. A small stack of books beside the pot turns a stand into a vignette. Then match the plant to the spot — bright corners deserve light-lovers, dim hallways the truly tolerant. These low-maintenance indoor plants are forgiving picks for beginners, and this gallery of indoor garden inspiration shows how far a few well-placed stands go. Feeling ambitious? Pair a stand with a hydroponic indoor garden for herbs at counter height. For more build ideas, browse the project guides at The Spruce and Better Homes & Gardens.